


Backpacking the Philippines is a trip to an absolute island paradise. The Philippines is home to remote islands and a stunning underwater world. We spent almost 3 weeks in March 2022 travelling through this beautiful country and visited some of the most beautiful places it has to offer. Our Philippines itinerary is especially suitable for first-time visitors who want to get a first impression of what the more than 7,000 islands have to offer.
Last updated: July 2026
Only Have 2 Weeks? Here’s How to Shorten Our Route
You don’t have to skip any of the three islands if you only have 2 instead of 3 weeks – just shorten your stay at each one. From our 18-day route, here’s what we’d cut: in Cebu/Moalboal, 3 days instead of 5 are enough – skip day 5 (Cancalanog Falls) entirely and combine Kawasan Falls and the Sardine Run into one day instead.
We wouldn’t shorten the 3-day boat trip from Coron to El Nido (days 9-11) – that was the highlight of our entire trip. Instead, save the time in El Nido itself: 4 days instead of 7 are enough for Taraw Cliff/Canopy Walk, one boat tour (A or B) and a relaxed beach day. That brings you to about 14 days including arrival and departure.
– Cebu/Moalboal: 3 instead of 5 days (combine Kawasan Falls + Sardine Run, skip Cancalanog Falls)
– Coron: unchanged, 2 days
– Boat trip Coron–El Nido: unchanged, 3 days (our highlight, don’t shorten this)
– El Nido: 4 instead of 7 days (only one boat tour, Taraw Cliff/Canopy Walk, one beach day)
Philippines Backpacking Itinerary
With almost 7,000 islands, it’s not exactly easy to plan an itinerary for a first trip to the Philippines. For our trip we planned 3 islands for 3 weeks (Coron, Cebu and Palawan). We wouldn’t recommend more than that for a maximum of 3 weeks, unless you really don’t want to miss anything and are willing to accept a bit more stress in return.

Beim Klick wird Youtube.com aufgerufen (Datenschutzerklärung) | By clicking, Youtube.com opens (Privacy)
Day 1 | Arrival Manila – Onward Journey to Cebu (Moalboal)
You’ll probably start your 3-week Philippines backpacking trip the same way we did, via Manila, since there are only a few, very expensive direct flights to Cebu City or other islands. Since most flights from Germany land in Manila late at night, you’ll likely be forced to spend one night in Manila before flying onward early the next morning.
For a short but still comfortable night near the airport we can recommend KHotel Manila*. Here you’ll sleep in comfortable double rooms with a balcony and air conditioning.
The next morning, fly as early as possible, for example with Cebu Pacific, to Cebu City and take a bus or taxi from there to Moalboal. We wouldn’t recommend staying in Cebu City itself, as the city doesn’t have all that much to offer and is loud and uncomfortable instead.
We recommend heading straight south to the touristy hotspot of Moalboal. It’s much quieter and more beautiful there, and all the highlights and sights of southern Cebu are nearby.
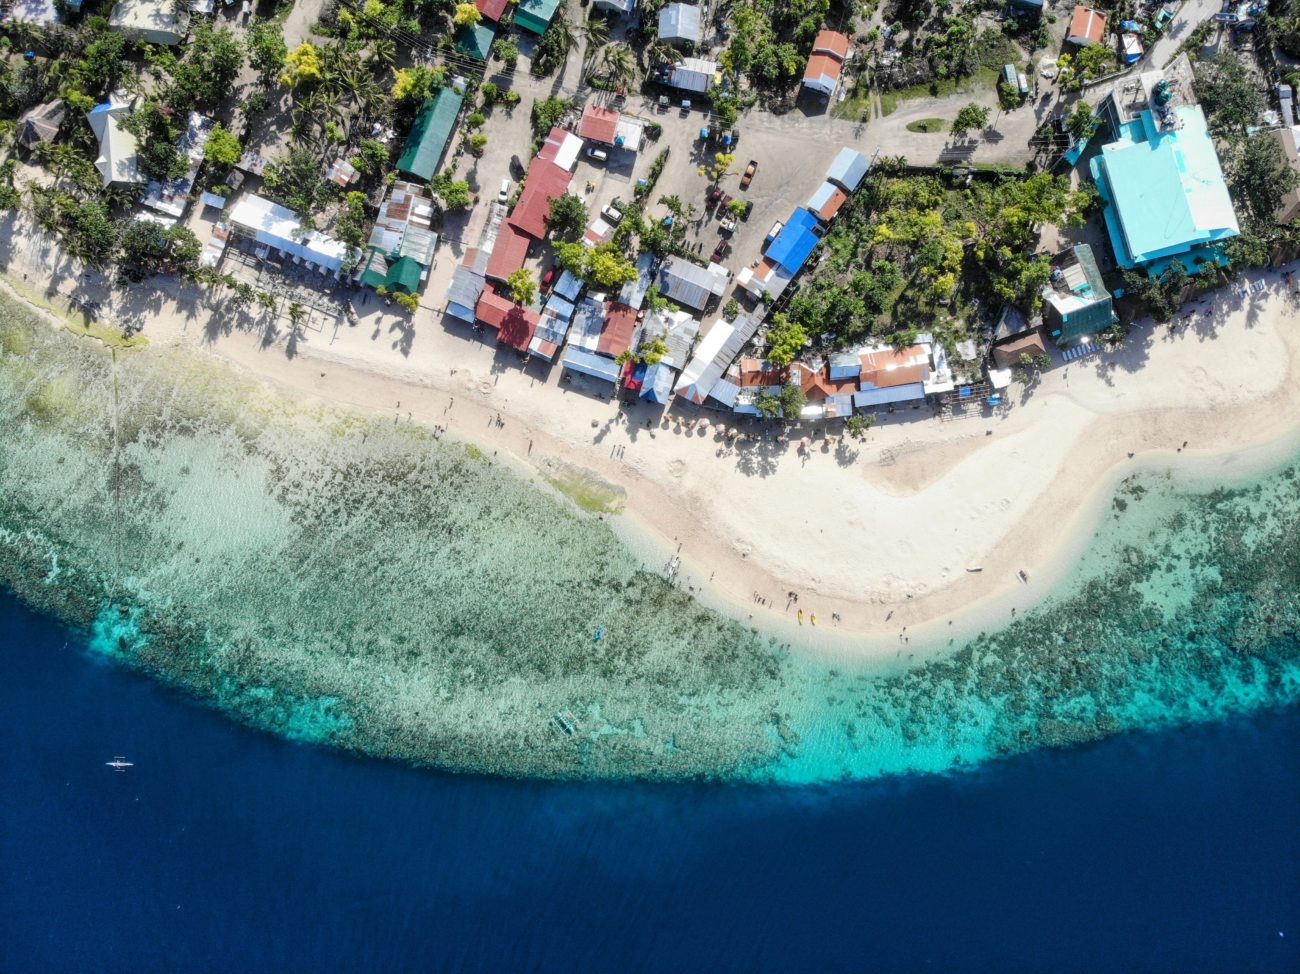
Backpacking Philippines – Getting to Moalboal
You have several options for getting from Cebu Airport to Moalboal, ranging from cheap and slow to fast and expensive. Here’s how to get from Cebu Airport to Moalboal in the best or cheapest way.
By Taxi (fast & expensive)
Right at Cebu City Airport, taxi drivers will approach you at the exit offering to drive you straight to your hotel in Moalboal for 2,000–2,500 pesos. You can of course haggle a bit to get a better price. We think this is the best option, since it’s the fastest and takes you straight to your hotel. For 2 people, this option costs less than 1,000 pesos (€17) more than the cheapest bus or minivan option. In exchange you save several hours of travel time and travel comfortably and safely.
By Minivan (slower and cheaper)
We chose this option, but wouldn’t do so again. You take a taxi from the airport to the van terminal on Junquera Street downtown (Google Maps). That takes about 30 minutes and costs 500 pesos. There you’ll be loaded into the next waiting vehicle and have to wait until the van is full.
That can take up to an hour. The price per person is 180 pesos. If you’re carrying large backpacks that take up a seat, you’ll pay the price of a person for that too. At the van terminal you can buy food and drinks at plenty of stalls. The van takes about 3-4 hours to Moalboal and drops you off at a large parking lot right in the town centre. There you’ll need to pay your “tourist tax” (pass slip) and can then take a trike to your hotel.
By Bus (even slower and slightly cheaper)
It’s a similar story if you want to take the bus to Moalboal. You take a taxi to the South Bus Terminal (Google Maps), which takes about 30 minutes and costs about 500 pesos. There you board the next bus heading south. A ticket costs 150 pesos per person. The bus takes more like 5-6 hours, since passengers get on and off along the way.
Our Experience Getting to Moalboal
As mentioned, we chose the taxi-plus-minivan option for our Philippines backpacking trip. We had to wait another hour at the van terminal, time we would rather have spent at the beach. Since fares are generally quite cheap, we’d recommend the faster taxi option instead. The minivan ride was still fine though, once it finally got going. We spent the whole time looking out the window, getting our first impressions of what awaited us in the Philippines. The travel time flew by for us as a result. Still, we were really glad when we finally arrived in Moalboal.
In Moalboal we first paid the tourist tax and within about 10 minutes had continued on to the beautiful Ravenala Hotel right on the gorgeous White Beach. We threw on our swimwear straight away and jumped into the sea. If you arrive early enough, you should also go for a quick snorkelling trip right away. The reef right at White Beach in front of the hotel is beautiful, and especially around sunset there’s a good chance of spotting turtles here.
Hotel Recommendation Moalboal
Ravenala Beach Bungalows The Ravenala is an absolute recommendation from us. It really is the most beautiful hotel in the area and a wonderful place to feel at home. The photos on Booking.com* simply do not do justice to this great place. The hotel is located in a beautifully maintained garden with several bungalows, from which you have a view of the beach and the sea.


- super delicious food (breakfast included)
- beautiful garden
- directly at the beach (White Beach) and the sea
- huge coral reefs only a few meters from the beach
Day 2 | Scooter Tour to the Cebu Waterfalls
Today marks the first real day of the Philippines itinerary. The area south of Moalboal has an incredible number of waterfalls that you can visit on a tour or on your own. We’d recommend simply renting a scooter and riding it to the most beautiful waterfalls around Moalboal in Cebu. That way you’re independent and super flexible, and it’s fun too. During our Philippines trip in March 2022, some access roads to the waterfalls were still wrecked by the typhoon that hit the Philippines at the end of 2021. As a result, we unfortunately couldn’t visit all the waterfalls near Moalboal.
Here are the most beautiful Moalboal waterfalls anyway:
Kawasan Falls
The Kawasan waterfall is probably the most famous waterfall on all of Cebu. The multi-tiered falls are located in the province of Badian in western Cebu. Kawasan Falls consists of 3 levels, each with natural pools. These natural pools are filled with the falls’ “Gatorade-blue” water and are perfect for swimming and taking plenty of great photos. Photos sitting on the wooden raft are especially popular. The surroundings of Kawasan Falls are simply incredibly beautiful too. Limestone gorges enclosed by the glowing green of the trees and plants. Simply wow!


The best time to visit the falls is during the dry season between late December and early June. At this time the falls and the river carry less water and can usually be visited without any issues. During the rainy season, on the other hand, water levels can be too high and the current too strong, meaning a visit to the falls or a canyoneering tour may not be possible. During the rainy season you should keep an eye on the weather and check in advance whether a visit is possible.
Kawasan Falls canyoneering | Check prices*
Since Kawasan Falls is one of the main attractions on Cebu, you should get there early in the morning. That way you can enjoy the falls and the beautiful nature without too many other people around.
In March 2022 we could “only” do the canyoneering tour and couldn’t visit the actual Kawasan Falls. The typhoon at the end of December 2021 had destroyed much of the tourist infrastructure, so the normal entrance to the falls wasn’t accessible. The canyoneering tour also ended before reaching Kawasan Falls itself. Still, the tour was an amazing experience that you shouldn’t miss.
As of 2026: Kawasan Falls is fully reopened again, entry costs 200 pesos per person (Level 1, including the bamboo raft option). The canyoneering tour is now regulated by the local LGU and costs a flat 1,500 pesos per person, including guide, equipment and lunch.
Montpellier
Montpellier Falls is a more off-the-beaten-path alternative to Kawasan Falls. There’s no multi-tiered waterfall here, but you can enjoy the very tall falls with its turquoise natural pool in peace, without having to share it with many other people. Montpellier Falls is about 1 hour from Moalboal. From the road, you’ll reach the falls after about a 15-minute walk. The path leads through private land. Unfortunately, this waterfall was also closed as of our 2022 visit. It’s best to ask at your hotel beforehand whether the falls can be visited.
Cambais Falls
Cambais Falls was fortunately open during our visit to Cebu, so we were able to visit it. However, here too you could see the damage the typhoon had left behind, with parts of the surrounding nature destroyed. From Moalboal you’ll reach the access point to Cambais Falls after about 50 minutes. The scooter ride takes you up into the hills. You’ll reach the actual Cambais Falls after about a 15-minute walk. Since the path currently isn’t very well marked, we’d recommend taking a guide, at least for the way there.


Our guide was a young boy, who we were happy to give a few pesos to lead us to Cambais Falls. He also showed us how to climb up on the right side of the first small waterfall to reach the one behind it as well.
Here we said goodbye to our guide so we could enjoy the wonderful nature and a quick dip in the waterfall’s pool in peace. Afterwards we made our own way back and got to spend a few minutes with some adorable little puppies. On the way back we also kept stopping briefly to enjoy the great scenery and soak up the impressions.
Day 3 | Sardine Run and White Beach, Moalboal
Relaxing and swimming at the beautiful White Beach is always an option, but for today we had planned some extra action. At the nearby Panagsama Beach you can experience an incredible natural spectacle. We rode the scooter about 15 minutes from White Beach to Panagsama Beach, which is the actual touristy centre of Moalboal.
You’ll find plenty of restaurants, bars and of course hotels here. All in a less beautiful setting than the northern White Beach though, which is why we wouldn’t recommend staying here at Panagsama Beach. You can simply ride your scooter into the town centre and park it anywhere near the beach. It doesn’t really matter exactly where, but so you have a point for your GPS, you can head to the following spot to park your scooter (Google Maps). You can then simply walk into the water and swim just a few minutes out to where you can see the thousands of sardines.


It’s truly hard to believe, but it’s real. You swim just 50 metres out from the beach and immediately see thousands upon thousands of sardines swimming in a huge shoal just a few metres beneath you. You should bring fins or rent some, since they let you move really well underwater and allow you to freedive through the sardine shoals. An incredible spectacle you shouldn’t miss during your Philippines trip.
You can easily spend several hours here, or as long as your energy lasts. If you’d rather do this as an organised tour, you can book one here*. You’ll be picked up from your hotel and, besides a guide who shows you the perfect sardine spot, you’ll also get snorkel and fins.
Book a free diving & snorkelling tour at the Sardine Run* | Check prices*
In the afternoon we relaxed at White Beach in front of our hotel (Ravenala Beach Resort*) and enjoyed the sunset with a cocktail.
Day 4 | Kawasan Falls Canyoneering
Today we were up for a bit more action, and what better place for that in Cebu than canyoneering at the famous Kawasan Falls. We’d only ever done canyoneering in India before – it’s a hike through a narrow gorge, or the river running through it.
You can’t do this tour on your own, you have to book it with a guide. We booked ours directly at our hotel, but you can also book a tour online*. We paid about €25 per person for the tour and were picked up from our hotel by trike in the morning and dropped off again in the afternoon.
Kawasan Falls canyoneering | Check prices*
The Kawasan Zipline
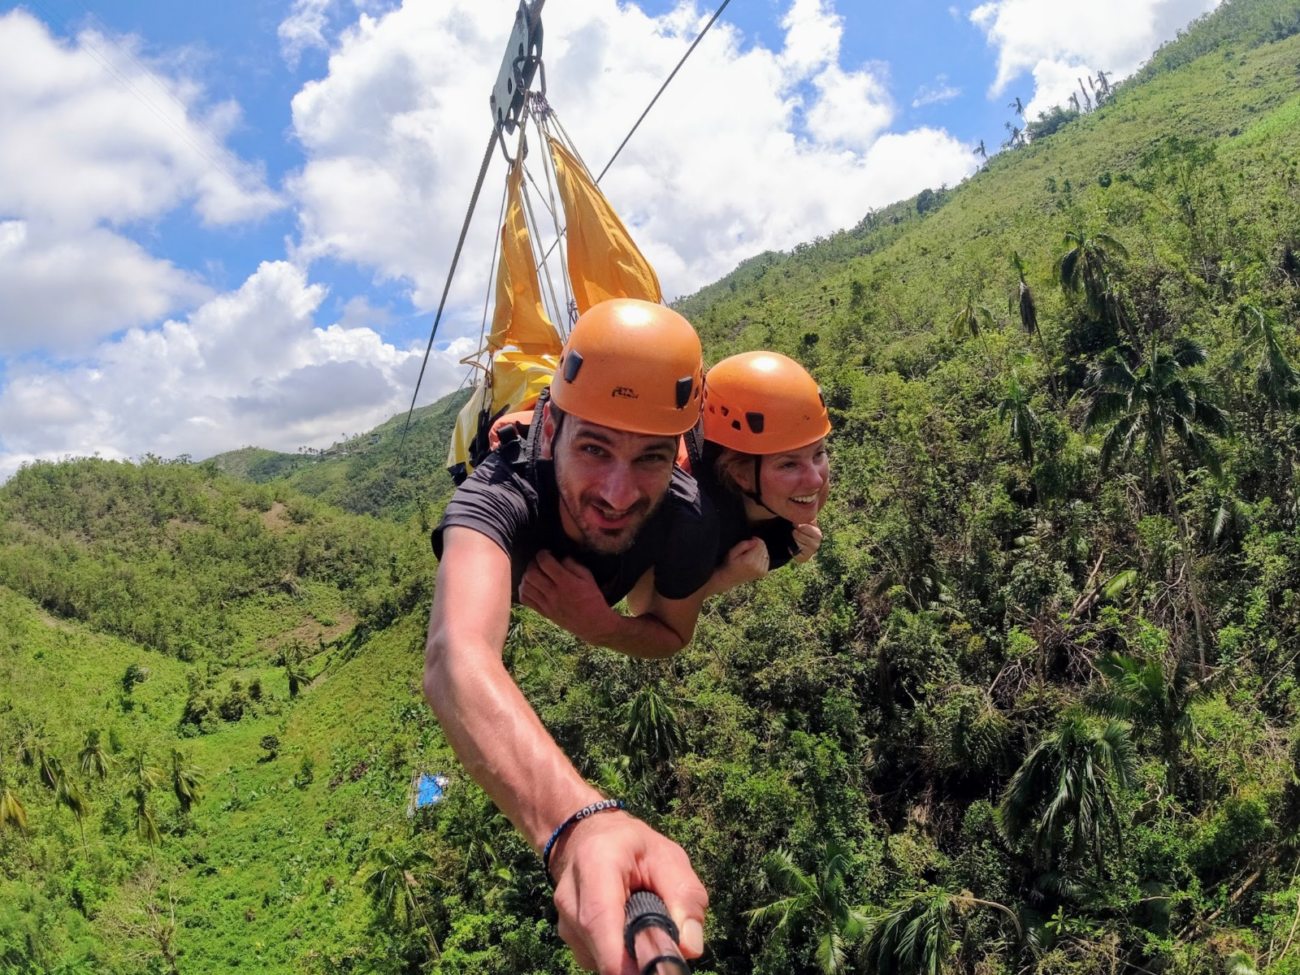 At the starting point of the canyoneering tour, the first highlight was already waiting, as we were given the choice of either walking 20 minutes to Kawasan Canyon or covering the distance by zipline. The choice wasn’t hard, and just a few minutes later we were hanging in a safety harness on a wire several hundred metres long.
And off we went, zooming at some speed roughly 50 metres above the jungle, having a blast. The fun started to fade though as we approached the finish platform, where helping hands were already waiting to get us off the line. But just before that platform, our momentum – and maybe our luck – ran out, and we stopped and slowly slid backwards towards the middle of the zipline. Oh no!
So there we hung, waiting for someone to get us down. A strange situation. After a few minutes we saw someone clip onto the zipline from the platform and crawl towards us. After what felt like endless minutes of waiting, he finally reached us and attached a rope to our harness, which his colleagues on the platform used to pull us in, bit by bit. We were finally safe and could walk the remaining metres to the start of the Kawasan hike.
Kawasan Canyoneering
After the zipline we had to walk a few more minutes before the canyoneering tour finally began. Once we stepped into the water of the Kawasan River, the (not too strong) current swept us along and we could simply let ourselves drift while admiring the roughly 50-metre-high canyon walls.


Over the next few hours, drifting in the water alternated again and again with climbing, walking and of course jumping into the water. The guide always showed us exactly where to go and what to watch out for. There’s no paved path or any kind of railing to hold onto, so you really have to watch where you’re stepping or jumping.
The highlight of the whole canyoneering hike at Kawasan Falls is of course the many small and large jumps you sometimes have to make (usually the small ones) and sometimes get to make (usually the big ones). It’s not always easy and quite a thrill, but when the guide jumps first and shows you exactly where to jump (and where not to), it’s all doable and relatively safe.
After a few metres, a small rock outcrop came into view and I knew right away this would be the jump that would cost me the most nerve. This outcrop was probably 7 metres high, and 7 metres looks just as high from above as it does from below. Still, I wanted to take the jump. And after our guide jumped first and called up to me unmistakably to finally jump down too, I finally gathered all my courage and leapt into the depths. The free fall is both the worst and the best part, but after a second it’s already over and you land in the deep water knowing you made it.
Kawasan Falls canyoneering | Check prices*
The Last Waterfall of the Kawasan Hike
After this exciting experience, things flatten out a bit and you get some time to admire the beautiful nature around you again. After a few minutes you reach the last waterfall of the hike. The actual last one would be Kawasan Falls itself, but during our trip not all the typhoon damage had been cleared yet, so the actual Kawasan Falls was closed to the public.
The last waterfall on our tour was still very impressive and beautiful though. We were lucky enough to have it entirely to ourselves and could take photos in peace and enjoy the nature. We also bought some fried bananas and something cold to drink from a stall to refuel before heading back to the road and then to the hotel.
Want to know more about Kawasan Falls canyoneering? Read our full report:
Kawasan Falls Canyoneering I Waterfall Hike in Cebu
Day 5 | Scooter Tour to Cancalanog Falls and Sardine Run
Today we wanted to check out another Cebu waterfall, this time a less-visited and less crowded one. We chose Cancalanog Falls in the central hill country of Cebu. Since we wanted to stay flexible and adventurous, we of course rode there by scooter again. The ride takes you along the main road from Moalboal heading south, before leading you after a short time into the hilly centre of Cebu island. The road gets a lot more adventurous here. It’s not fully paved and you sometimes have to ride very carefully so the narrow scooter tyres survive.
After a few kilometres we were almost there, just needing to ride a short but very steep stretch downhill. We managed that reasonably well, but were already dreading the way back, where we’d have to ride that steep stretch back uphill. Would our little scooter even manage that with both of us on it?
Arriving at the official (very small) car park (Google Maps) we parked our scooter and walked another roughly 200 metres downhill through the forest until we finally arrived. We have to admit, the waterfall isn’t really that tall and probably shouldn’t really be called a waterfall, since the water only drops a few metres here. But the natural pool the water falls into is genuinely beautiful, lined by steep rocks.


Here too the typhoon left its mark, as the terrain isn’t really in great shape, so the path down to the water feels quite adventurous, since you have to walk over cracked and broken concrete slabs and sometimes hold onto branches. We swam several laps in the cool water and had the waterfall entirely to ourselves. Well, apart from the construction workers cutting down a tree with screaming chainsaws just a few hundred metres away. But you can’t have everything.
Once we’d had enough splashing about, we walked back to our scooter and tackled the steep climb. Unfortunately the path really was too steep for us, so Sabrina had to get off and walk so I could get up the hill alone. Back at our hotel in Moalboal, we used the rest of the afternoon to go check out the sardines at Panagsama Beach again. We still had the scooter, so we grabbed our snorkelling gear and quickly rode over.
This time we went in at a different spot, so we had to swim a little less far to reach the sardines. Once again the fish shoals were right below us, and we could almost touch them with our feet. Today’s special highlight was spotting a sea turtle just a few metres from us, right below the surface. We quickly dove towards it, and since I had large fins with me this time, I could get really close to the graceful turtle and take some really great photos. What a great day!
Day 6 | Arrival in Coron
After 4 days we leave Cebu again. If you only have 2 weeks for a Philippines trip, you can shorten your stay on Cebu by 1-2 days as well.
Today’s leg of our Philippines itinerary took us to another, this time much smaller, island: Coron, or rather Busuanga. Busuanga is actually the island’s real name. Even though Coron is only 1.5 flight hours from Cebu City, the journey from Moalboal is a full day trip. Coron is where our wonderful Palawan itinerary began, one of the most beautiful regions in the Philippines.
At 6am we took a private taxi (3,000 pesos) straight from the hotel to Cebu Airport. The ride was fairly pleasant and only took about 3 hours. From Cebu City we then flew to Coron (Busuanga) at 1pm and took a minivan from there to Coron Town, which takes about 30 minutes from the airport in the north. Once in Coron Town we first sorted out our dive booking for the next day – we wanted to go shipwreck diving – and then headed to our hotel, La Natura, a bit outside town. There we relaxed by the pool after this exhausting day.
Hotel Recommendation Coron
La Natura Resort
La Natura Resort in Coron consists of a beautiful garden-like complex located a bit away from the hustle and bustle of Coron Town. You are in the middle of nature and far away from other tourists or the noise of the city. You wouldn't expect it, but the owners have built a wonderful resort here that you can't even imagine from the outside.
There is a large pool, a lovingly landscaped garden and the spacious cabins are equipped with large bed and ceiling fan.


- large pool with whirlpool
- lovingly landscaped garden
- away from the noisy hustle and bustle of the city
- WLAN & breakfast included
La Natura Resort | Check Availability*
Day 7 | Shipwreck Diving in Coron
On day 7 of the trip, it’s time to explore the underwater world again. One of the special highlights in Coron are the many shipwrecks from World War II lying right off the coast here. Almost nowhere else in the world is there such a high density of wrecks that are so easy to explore while snorkelling or diving. So today there’s a sightseeing tour of a very special kind.
A total of 10 Japanese warships from the Pacific battles of World War II lie here, dating back to when Japan occupied the Philippines. The Japanese warships that had retreated to Coron’s coast were destroyed by American forces within a very short time. The fact that the ships ended up so close to the coast is, despite the grim backstory, a real gift for adventurers like us today.


On a typical dive you visit 2-3 shipwrecks. On our wreck dive it was 2 wrecks and one spot with colourful coral. It was absolutely wild to suddenly discover such a huge ship on the seabed and then dive right through a small gap into the middle of it. We’d recommend this one-of-a-kind experience to every diver visiting Coron.
You’ll find everything you need to know about shipwreck diving in Coron here:
Coron Wreck Diving I Everything You Need to Know
Day 8 | Private Boat Tour Coron
An island-hopping tour on Coron* is probably one of the most beautiful sightseeing tours on Coron and during a Philippines trip. Even though Coron (or rather the main island of Busuanga) isn’t all that scenic itself, the lagoons and bays off its coast certainly are. The island world we saw on our Super Ultimate Tour off Coron is among the most beautiful nature highlights we saw on our entire Philippines trip.
Our sightseeing tour started as early as 8am. After a short wait while the boat captain’s paperwork was sorted, we were off to the following highlights.
Book an island hopping tour on Coron | Check prices*
The Highlights of the Coron Super Ultimate Tour
Kayangan Lake
Kayangan Lake is probably the most famous lake in Coron and definitely one of the most beautiful spots in the region. If you’ve booked a private tour, you’ll hopefully be ahead of the other group tours at this lake. You first sail into a small bay that’s already beautiful on its own.
Then you head down the stairs to the actual Kayangan Lake. There’s a large jetty there that reveals a view of the truly crystal-clear, greenish-shimmering water. The water here is freshwater by the way, and the lake has really impressive underwater rock formations. You can check these out while snorkelling or freediving.


Since we were lucky enough to be first at Kayangan Lake that day, we got to enjoy the lake almost entirely to ourselves for nearly half an hour before other tourists arrived. Then it was on to the next highlight, the neighbouring Barracuda Lake.
You can find out more about Kayangan Lake here: Kayangan Lake I Tips for Coron’s Most Beautiful Highlight
Barracuda Lake
Barracuda Lake sits right next to Kayangan Lake, and as the name suggests, its special feature is the barracudas you might get lucky enough to spot. Barracudas are roughly 1-1.5 metre-long predatory fish, which can potentially be dangerous under certain circumstances. Barracuda Lake is quite similar to Kayangan Lake next door.


Here too the boat dock is on one side, you walk up a staircase between the sharp limestone rocks to the other side, where there’s a large jetty and the lake’s almost transparent water. Barracuda Lake is actually up to 40 metres deep and has a pleasant water temperature of 28°C all year round. The main activities at Barracuda Lake, just like at Kayangan Lake, are swimming and snorkelling, and of course keeping an eye out for barracudas.
You can find out more about Barracuda Lake in our separate travel report.
Twin Lagoons
The Twin Lagoons are yet another very special highlight of Coron’s island world. As the name suggests, this highlight consists of 2 lagoons connected by a thin rock wall. At low tide you can swim through a hole in the rock wall, or at high tide climb over the wall via a ladder.


On the other side of the Twin Lagoons there’s unfortunately not much else to do besides swim, since there’s no jetty or anything else to walk on there either. This side of the lagoon also doesn’t look quite as spectacular as the other side where the boats anchor. That’s why we’d recommend not lingering too long, and instead swimming back to the rock wall and taking the ladder this time. With the boat side in the background you can really get some very nice photos.
Want to know more about Twin Lagoon? Read our travel report: Twin Lagoon Coron I The Most Important Tips for Your Visit
Beach 91
Lunch is served at this beach during the sightseeing tour. The beach itself is already beautiful and perfect for swimming. The lunch tops it all off though. We had a huge buffet with seafood, crab, chicken, vegetarian options and of course fruit galore.


After lunch we even had some time left to explore the area a bit by kayak. Right next door there’s also the Sunset Cove, a small bay that’s great to explore by kayak too.
Twin Peaks Coral Garden
Here another beautiful snorkelling spot awaits, where you can explore Coron’s fantastic underwater world. Don’t forget your snorkel mask, there’s plenty to discover here.
CYC Beach
The Super Ultimate Tour in Coron wraps up at CYC Beach. So after all those tiring activities, it’s time for a bit more relaxation. The sand is super fine, and there are also some mangroves along the edge of the beach. You can go for a swim here or simply relax on the beach.
Since this is the last stop, you’ll head back to Coron’s harbour afterwards.
Where Should I Book a Boat Tour in Coron?
We can absolutely recommend the operator El Nido Paradise*. This is also who we booked the highlight of our entire Philippines trip with, the 3-day boat trip from Coron to El Nido.
You can read more about that here: 3-Day Boat Trip from Coron to El Nido I An Unforgettable Journey This operator also offers all kinds of trips on Coron, including the Super Ultimate Tour where you’ll visit all the highlights described here.
Super Ultimate Tour with El Nido Paradise | Check prices*
Day 9-11 | Boat Trip to El Nido
If we had to name one highlight of our Philippines backpacking trip, it would probably be this tour. Over 3 days we travelled by boat from Coron to El Nido and visited plenty of beautiful remote islands, snorkelling spots and even a cliff to jump off during that time. Simply the feeling of always being on the move during this island-hopping trip, and no matter when or where you looked over the railing, always seeing hundreds of green, overgrown Philippine islands, made this trip so incomparable.
But let’s start from the beginning: after lots of research, we booked this island-hopping boat trip from Coron to El Nido with operator El Nido Paradise*. They have plenty of very good reviews, and the price was also very good compared to other similar operators.
El Nido Paradise Boat Trip Coron-El Nido | Check prices*
Our tour started with us meeting up early in the morning at Coron harbour. There we had to sort out a few organisational things before heading onto the boat. There was a short briefing at the start before we set off towards our first destination. The first day started with a snorkelling stop at the Blue Lagoon near Coron and then took us to Ditaytayan Island, where we saw one of the most beautiful beaches. After the obligatory photos, we simply relaxed in a hammock and enjoyed the view and the peace and quiet.


Life on Board
This is roughly how all the days of the three-day boat trip play out – it’s a completely individual mix of activities like snorkelling, kayaking or visiting remote island beaches, relaxing on board and great food. New activities are offered almost every hour (sometimes even more often), which you can join or not, entirely up to you. Throughout the day you’ll visit various snorkelling spots, remote beaches, sandbanks and gorgeous islands.
The great thing is that under normal circumstances you’d never reach these amazing places and islands in the Philippines. The regular one-day tours you can take from El Nido or Coron never go out this far. That means the beaches and islands you get to experience on a three-day boat trip like this, you’ll only ever see on a multi-day trip like this one.


We simply felt completely at ease and could hardly believe what a beautiful landscape we were sailing through. And then there’s the incredibly delicious food that the crew from El Nido Paradise* spoiled us with throughout the 3 days. For us this tour really was the absolute highlight of our Philippines trip, and we really want to recommend it to you.
Stunning 3-day tour between El Nido and Coron | Check prices*
You’ll find everything you need to know about the 3-day boat trip from Coron to El Nido here:
3-Day Boat Trip from Coron to El Nido I An Unforgettable Journey
Day 12 | Backpacking Philippines – Exploring El Nido
After 3 days at sea, we’d recommend taking your time to settle into El Nido and get your bearings. El Nido is mainly split into two areas. On one hand you have El Nido Town with its lively streets, cafés, souvenir shops and hotels, and then the area around Corong Corong Beach. Things are a bit quieter here. You’ll mainly find beachfront hotels and a relaxed atmosphere. It’s about a 20-minute walk from Corong Corong Beach to El Nido Town, or just a few minutes by trike. So decide whether you want a bit more buzz or would rather enjoy the peace and quiet.


We spent the first day simply strolling through the streets, drinking great coffee and planning the next few days. Because even though El Nido is such a small town, there’s plenty to do.
El Nido Highlights | The Most Beautiful Palawan Sights
Hotel Recommendation El Nido
Fisheye Hotel
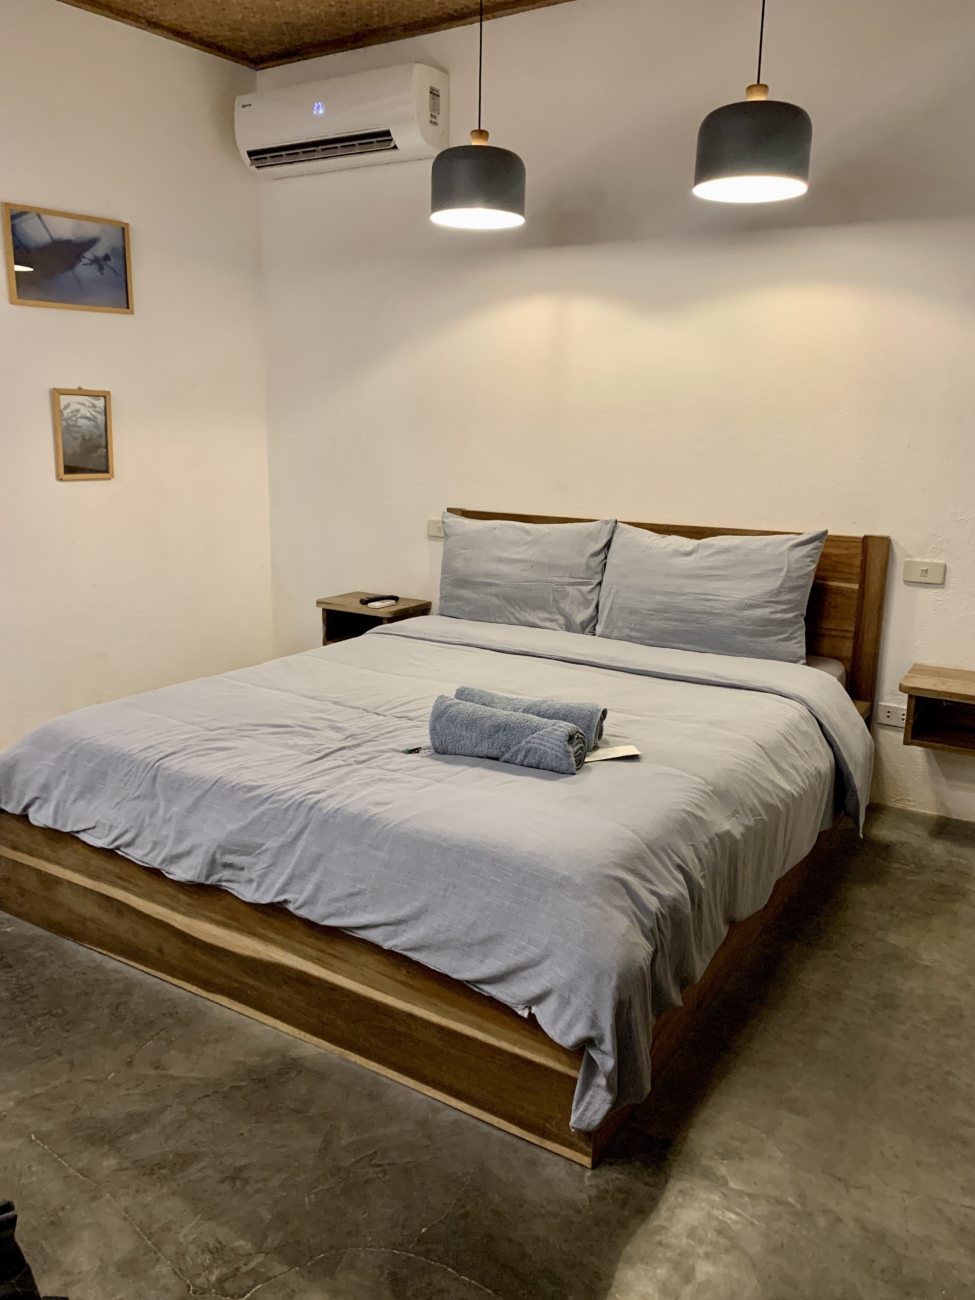 The Fisheye Hotel* sits right in the middle of the buzz of El Nido Town, yet you sleep peacefully in the backyard here. So you won’t really notice the noise of the town at all. The hotel only has 4 rooms and the whole property is lovingly decorated in Bali style. Breakfast is included and it’s delicious too. There’s also a hotel shop where you can buy nice jewellery and clothing. We felt very at home here, and everything is quickly reachable on foot.
- stylishly decorated in Bali style
- air conditioning and TV with Netflix
- rooms are peacefully located in the backyard
- double rooms from €30
Fisheye Hotel | Check availability*
Frendz Hostel El Nido
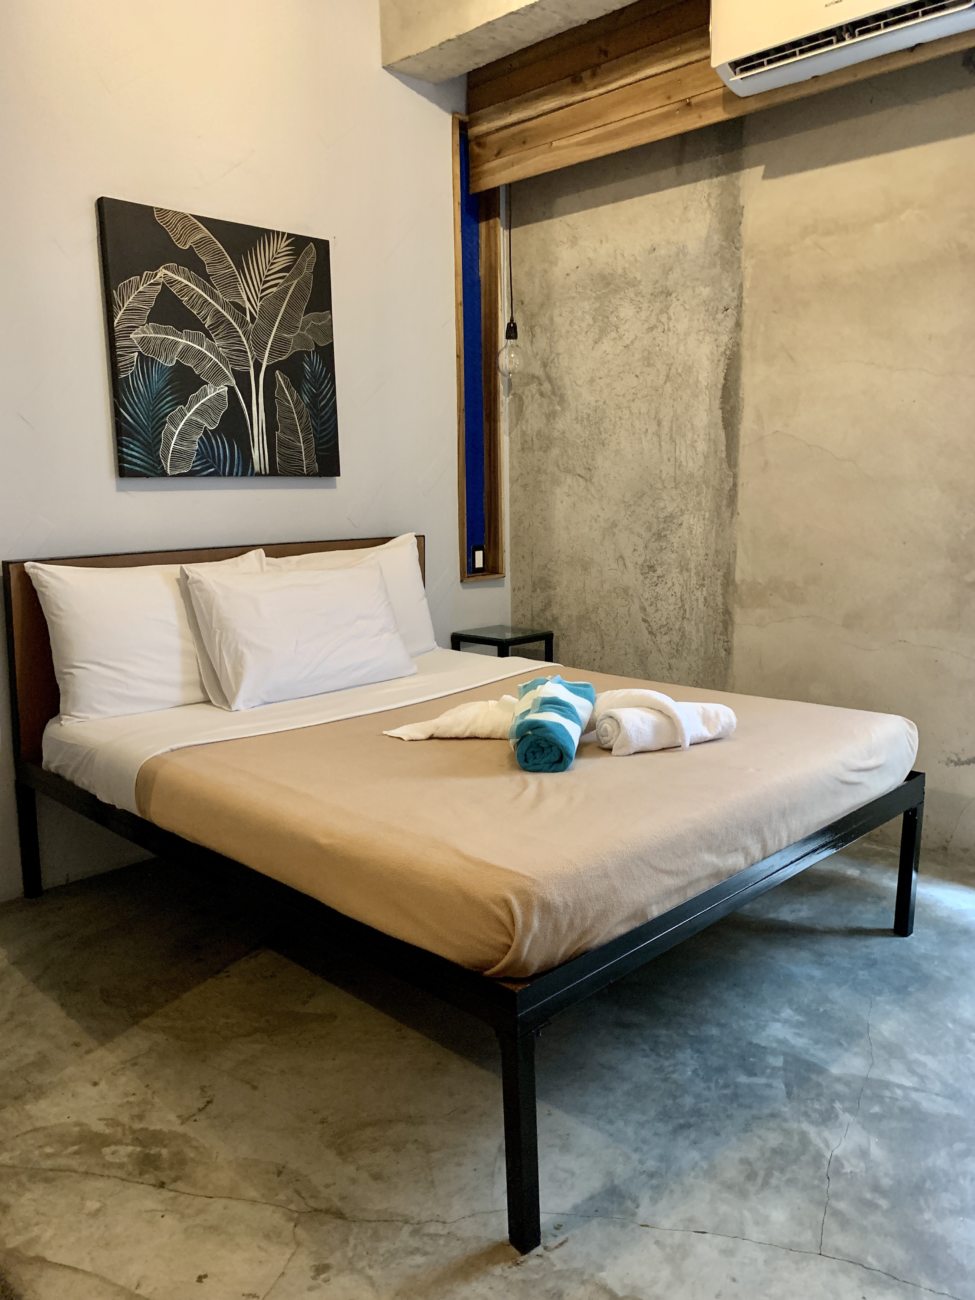 Want a bit more action and looking to meet other people quickly? Then you should check into Frendz Hostel*. From the rooftop terrace with its huge pool you get a breathtaking view of the sea. There’s a huge shared area with pool billiards and a bar. If you’re after peace and quiet you’re in the wrong place, but if you want to party on the rooftop terrace in the evening, this is exactly the right spot.
- large hostel in the middle of town
- huge rooftop terrace with pool
- large shared area
- party at the hotel pool in the evening
Hotel Recommendation at Corong Corong Beach
La Natura Resort
La Natura Resort in Coron consists of a beautiful garden-like complex located a bit away from the hustle and bustle of Coron Town. You are in the middle of nature and far away from other tourists or the noise of the city. You wouldn't expect it, but the owners have built a wonderful resort here that you can't even imagine from the outside.
There is a large pool, a lovingly landscaped garden and the spacious cabins are equipped with large bed and ceiling fan.
- large pool with whirlpool
- lovingly landscaped garden
- away from the noisy hustle and bustle of the city
- WLAN & breakfast included
La Natura Resort | Check Availability*
Moringa Resort
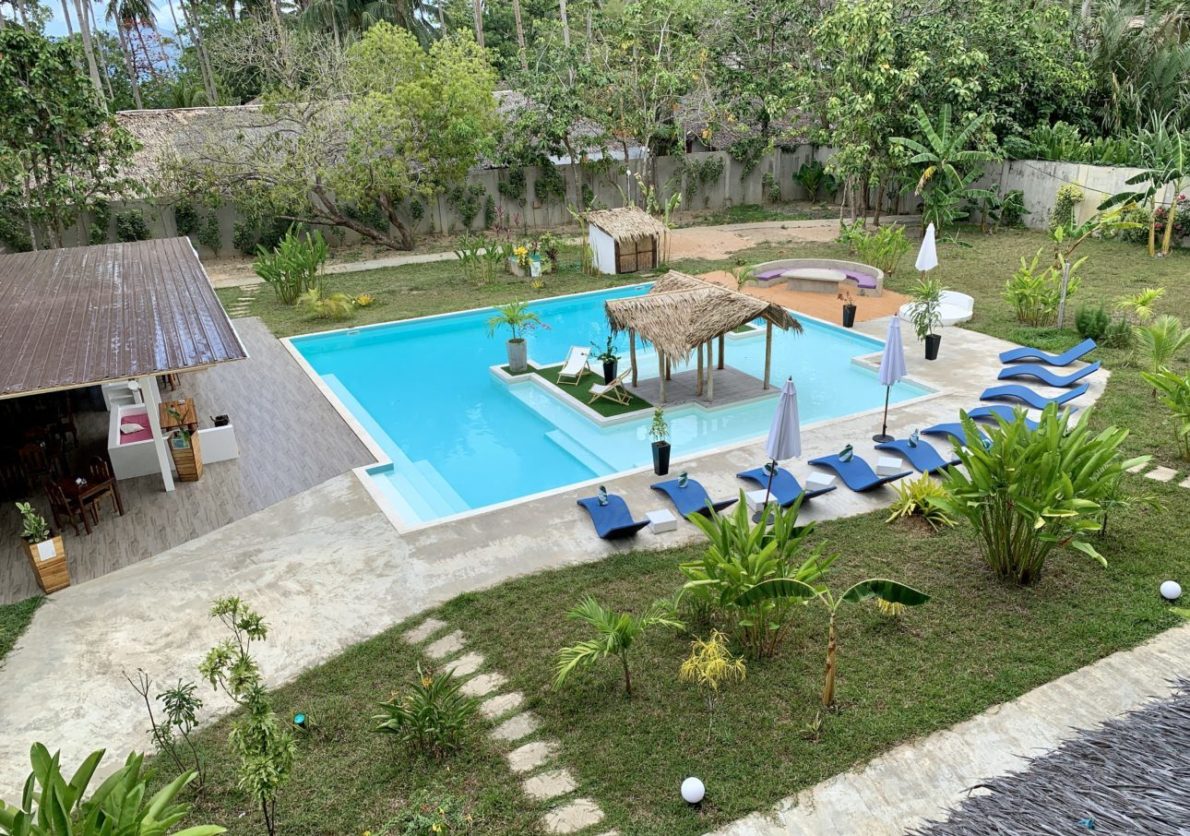 There are no bungalows here, just nicely furnished double rooms, from which you get a great view of the huge pool and the hotel grounds. From the higher rooms you even get a view of the nearby sea. Breakfast is included here, and you can also order dinner at the hotel restaurant. There’s WiFi too, and for 100 pesos you’re in El Nido Town within a few minutes by trike.
- large hotel pool
- nicely furnished double rooms
- every room has a balcony
- breakfast included
Moringa Resort | Check availability*
Day 13 | Scooter Tour to Nacpan Beach, Twin Beach and Marimegmeg Beach
To explore more than just the places within walking distance, we rented a scooter today for a little sightseeing tour. Exploring an area by scooter is something we love doing. You’re flexible and can shape the day exactly how you want. Our first destination for the day would also be the furthest one out… Nacpan Beach.
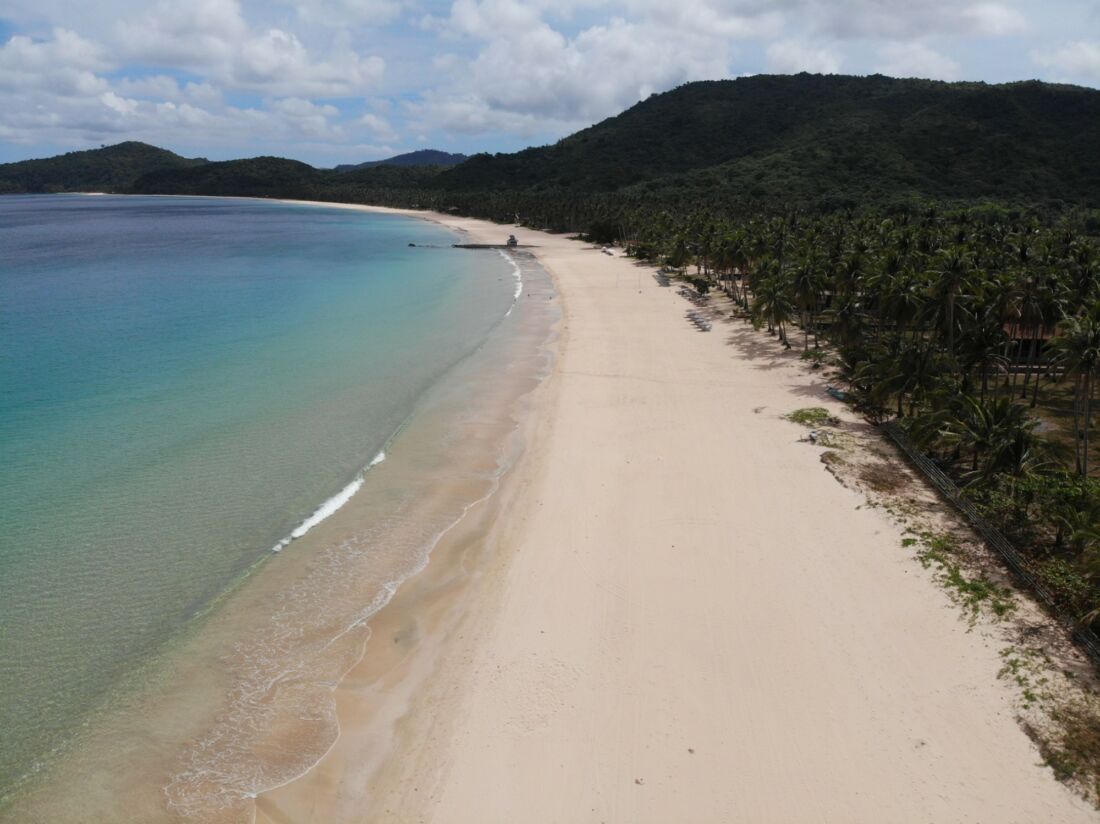
We reached Nacpan Beach from El Nido in about 45 minutes. Here a roughly 4km-long and 50m-wide bay awaited us. Beach as far as the eye can see. We went for a bit of a walk first to find a good spot. Unfortunately there weren’t that many shaded spots. Only near the beach entrance, where you can rent loungers with umbrellas and where the tourists gather.
After a short break for photos and flying the drone, we were also swarmed by little sand fleas and got bitten several times. That spoiled our visit to Nacpan Beach a bit, so we decided on short notice to stop for a quick lunch in El Nido and then head to the next beach. The next beach for the day was to be Marimegmeg Beach. It’s a bit north of El Nido. It’s about 50-55 minutes from Nacpan Beach.
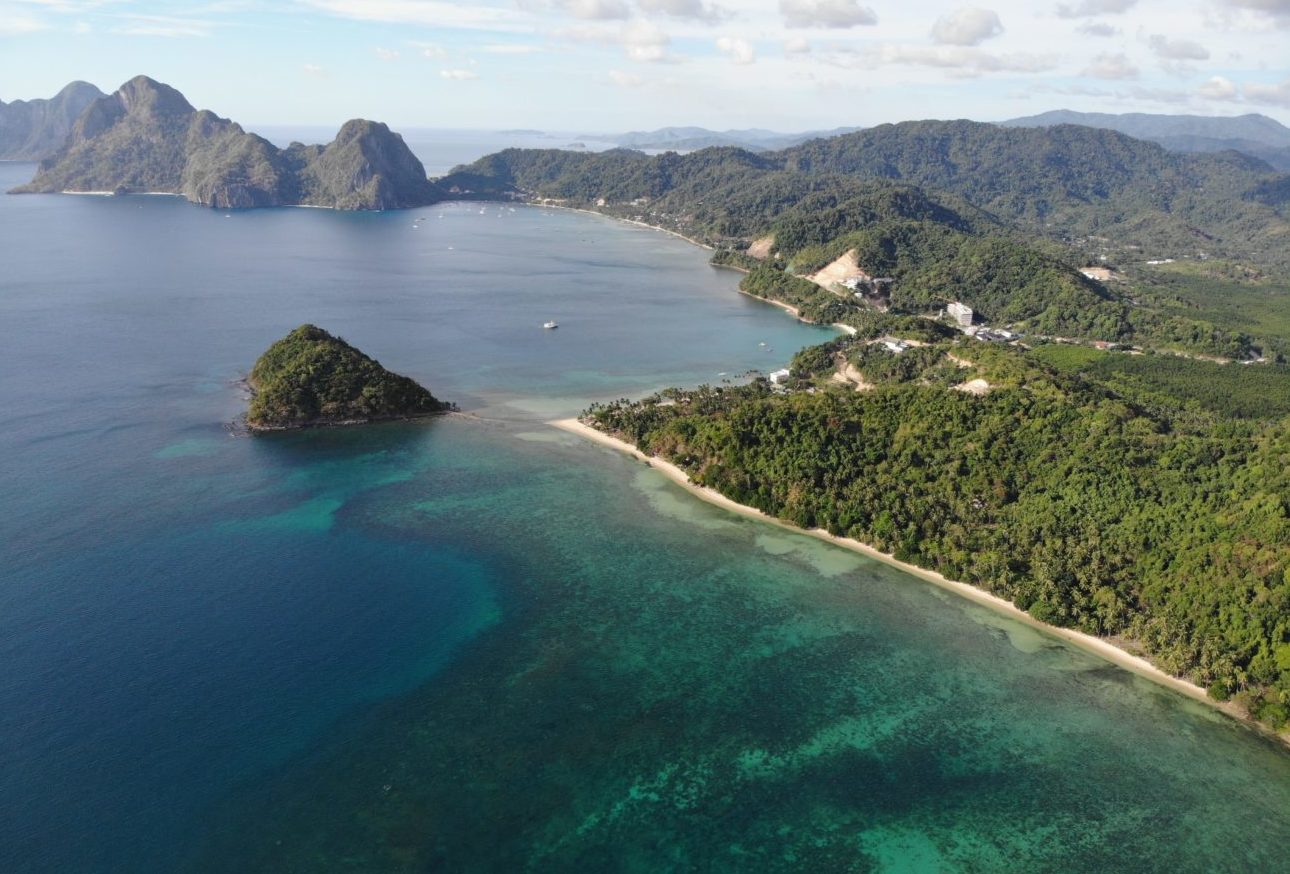
Marimegmeg Beach is considered El Nido’s most beautiful beach. The entrance to the beach leads through a path lined with plenty of shops on both sides. On the beach itself there are then plenty of hotels and also beach bars with cool music, swings and beanbags. You feel a bit like you’re in Bali here. The further you walk along the beach, the quieter it gets. So we found a peaceful spot too, to simply spend the rest of the day on the beach unwinding.
Day 14 | Boat Tour B
The new day was set to be a bit more active again, and we’d planned a boat sightseeing tour. From El Nido you can take 4 different boat tours, each visiting different beaches, bays and caves.
The various boat tours in El Nido are, funnily enough, standardised and named Tour A to D. They also cost exactly the same everywhere, so it doesn’t matter where you book your tour, since you’ll be randomly assigned to a boat on the beach anyway.
You can also easily book the tours online through the operator El Nido Paradise*. We were very happy with this operator. Everything is well and professionally organised!
Book a boat trip in El Nido | Check prices*
The different tours take you to various beautiful destinations, broken down as follows:
Tour A: Lagoons and Beaches
Tour A is the most popular tour in El Nido, since it includes the famous Big Lagoon among others. You’ll see a selection of El Nido’s most beautiful destinations here, but you’ll also meet the most other tourists.
- Big Lagoon
- Seven Commando Beach
- Secret Lagoon
- Payon Payong Beach
- Shimizu Island
Cost: 1,200 pesos + 200 pesos per person environmental fee
Tour B: Caves and Bays
On Tour B you’ll see mysterious caves, great beaches, and the particularly striking-from-the-drone Snake Island. Note that Snake Island is visited around midday, when there’s usually high tide, meaning the sandbank isn’t really visible.
- Papaya Beach
- Entalula Island
- Cudugnon Cave
- Cathedral Cave
- Snake Island
Cost: 1,300 pesos + 200 pesos per person environmental fee


Tour C: Hidden Beaches
This tour is the second most popular in El Nido and offers a great mix of adventure and snorkelling. You’ll visit beautiful beaches and the impressive Helicopter Island.
- Hidden Beach
- Star Beach
- Talisay Beach
- Helicopter Island
- Matinloc Shrine
Cost: 1,400 pesos + 200 pesos per person environmental fee
Tour D: Island Beaches
On this less popular tour you’ll visit, among others, Small Lagoon and a selection of El Nido’s most beautiful beaches.
- Nat-Nat Beach
- Paradise Beach
- Cadloa Lagoon
- Pasandigan Beach
- Small Lagoon
Cost: 1,200 pesos + 200 pesos per person environmental fee
As of 2026: the environmental fee is no longer charged per tour, but as a one-off Eco-Tourism Development Fee (ETDF) of 400 pesos per person, valid for 10 days. The tour prices themselves (1,200-1,400 pesos depending on the tour) remain as described in this article.
Our Experience with Tour B
For our Philippines backpacking trip we opted for the group Tour B. We had actually considered doing another private tour like in Coron, but wanted to save a bit of money this time. So we stood ready at El Nido Beach at 9am to start our tour. After some organisational matters, we boarded the boat and were ready to go. While the boats next to us were already setting off on their tours, we waited… and waited. One person was unfortunately far too late, which meant we didn’t set off until around 10am. That put a bit of a dent in the mood right from the start.
Entalula Beach
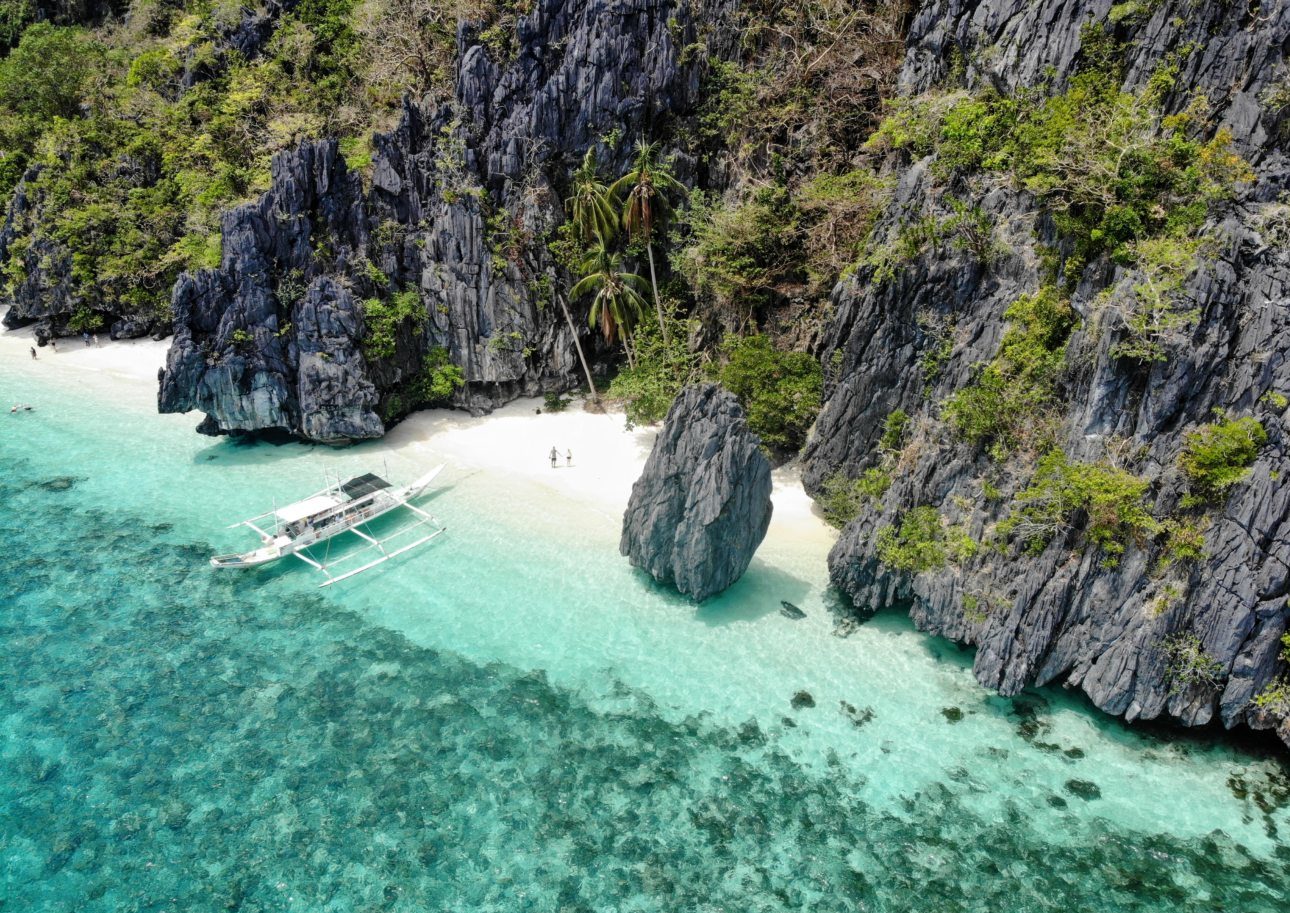
But our first stop instantly lifted the mood again. First up was Entalula Beach. That was actually the destination we were most looking forward to. In the right-hand bay a steep rock rises out of the water, making for a perfect drone shot. While the whole group snorkelled and walked along the beach in the left-hand bay, we had the right-hand bay entirely to ourselves. We just had to wade through hip-deep water to get there. Here we could take photos in peace, fly the drone and enjoy the incredible view. We had about 45 minutes at Entalula Beach, but would have happily stayed the whole day. A dreamlike spot that took our breath away.
Snorkelling
After the beach stop we headed on to another island. Here we moored next to a steep rock wall and could snorkel. The snorkelling spot was nice enough, but not comparable to other snorkelling spots we’d already seen in the Philippines.
Snake Island and Lunch
Next up was Snake Island. Snake Island is a long sandbank that stretches from a small island over to the “mainland”. Unfortunately we weren’t lucky with the tides on our visit. At high tide the sandbank is underwater and can only be guessed at. A real highlight is visiting at low tide. To still see the sandbank at high tide, you can climb a small hill on the little island within a few minutes for a better view. Or fly your drone for an even better view.
After coming down from the viewpoint, it was time to wait, since lunch is also served on Snake Island. You can pass the free time by exploring the small island further or going for a swim. We found a shady spot in the water, since it had gotten really hot by then, and simply relaxed a bit.
The crew really outdid themselves with lunch. There was a huge buffet with different kinds of meat and fish, vegetables, rice and plenty of fruit. There was also enough choice for vegetarians, so I (Sabrina) didn’t have to go hungry.

Cudugnon Cave
After so much beach and sea it was time for a change of pace. And Cudugnon Cave certainly delivered that. The boat stops a few metres from a beach at a limestone wall. From the mooring point you first went into the water, then through a hole in the limestone wall and into the cave behind it.


The cave was really huge and genuinely impressive. Some light shone into the first part of the cave through a few holes. The second part was a bit brighter, and you had the chance to climb around a bit and take photos. A really cool experience and a great change of pace from the other stops.
Cathedral Cave
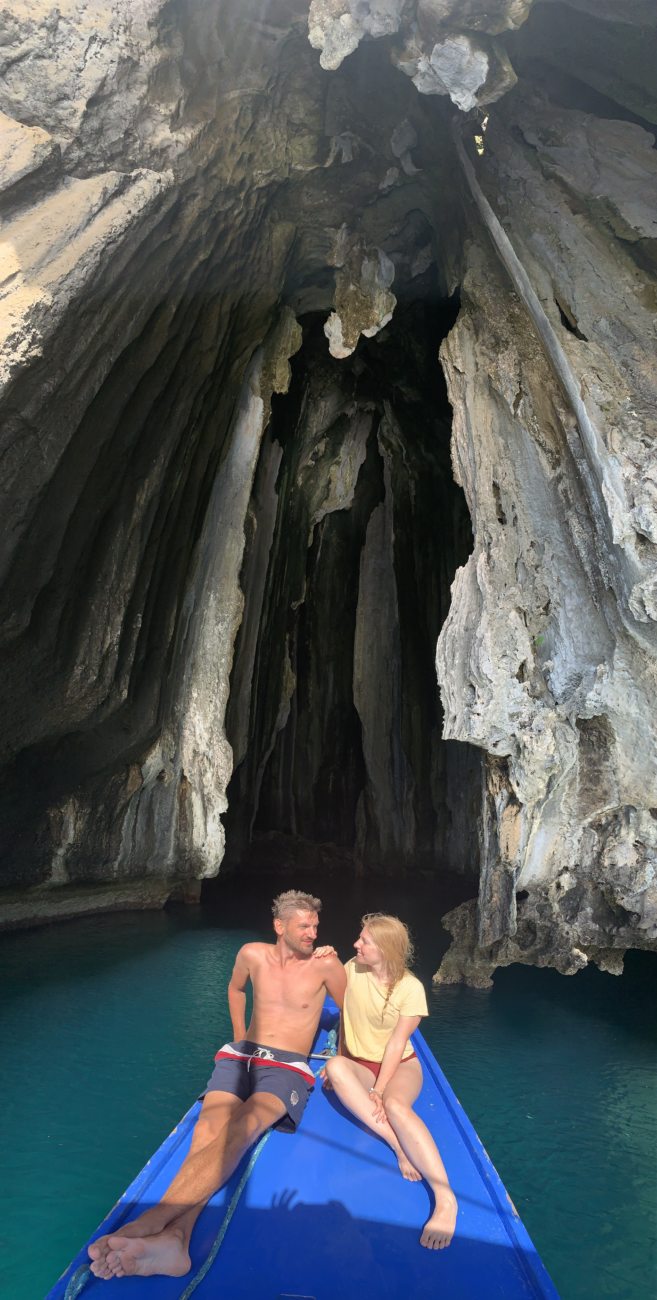 The last stop of our tour was Cathedral Cave. This is another large cave among the limestone cliffs. It’s already visible from the outside, and we sailed by boat to the cave entrance and could take a few photos.
Swimming isn’t allowed here unfortunately, apparently because there are some venomous sea snakes. So you can only admire this amazing spot from the boat. Once everyone had taken their photos, we headed back towards El Nido.
Return to El Nido
We actually found the ride back to El Nido really lovely and totally relaxing. We sat on the wooden boards on the outside of the boat, let our legs dangle over the sea, were still buzzing from the day’s impressions, and watched the islands around El Nido bathed in the warm light of the sunset. What a lovely way to end such a great day.
Book a boat trip in El Nido | Check prices*
Day 15 | Canopy Walk + Kayak Tour
The next day of our Philippines backpacking trip started early, with a little mix-up. We wanted to do the Taraw Cliff hike and set off for that just before 8am. We only briefly told our trike driver we wanted to go to Taraw Cliff and headed off without further research. We were dropped off at the Canopy Walk office and still thought we were in the right place… somehow we’d lumped the Taraw Cliff hike and the Canopy Walk together in our minds and thought it was the same activity. Long story short: these are two different activities.
Canopy Walk
So we started with the Canopy Walk. At the Canopy Walk office you can choose between 2 options. You can just walk to the top and enjoy the view, or also do the netted walkway. You pay 700 pesos per person if you don’t just want to climb to the top but also want to walk across the nets. You should definitely do that too. If you only pay 400 pesos, you climb to the top and then walk back the same way.
At the start you cross a long, wobbly suspension bridge. Here you’re secured to a guide rope with your safety harness, so there’s no way you can fall. The rest of the path is also really well secured. There are railings everywhere, and walkways and paths built into the rock, which make the hike relatively easy and definitely safe.


It’s never really strenuous, and you’re at the top in less than 20 minutes. From the viewing platform up there you get a fantastic view of El Nido Bay and the sea. If you chose the “big” package for 700 pesos, you then continue on across the various nets strung up at dizzying heights. There are plenty of photo stops along the way, and your guide will take loads of photos of you.


We really enjoyed the Canopy Walk hike and would rate it as one of El Nido’s highlights. You get a truly beautiful view from up there and enjoy a panorama you’d otherwise only get with a drone. We also had a really lovely guide, who told us a bit about the Taraw Cliff hike we’d actually wanted to do. The official route has been closed for some time now, since there were a number of accidents. Unofficially, however, there are guides who will take you up to Taraw Cliff. And our Canopy Walk guide does exactly that. So we didn’t have to think twice and booked the climb for the next day.
After the Canopy Walk we still just had the morning ahead of us and wandered around El Nido a bit more. Afterwards we headed to Corong Corong Beach, since we had another sporty activity planned for today.
Want more info on the Canopy Walk?
Canopy Walk El Nido (Taraw Cliff)
Kayak Tour at Corong Corong Beach
While researching our Philippines trip we barely read anything about kayak trips in El Nido. But since we love that kind of outing, it went straight on our to-do list despite the lack of information. And what can we say, it was one of the best outings we did in El Nido.


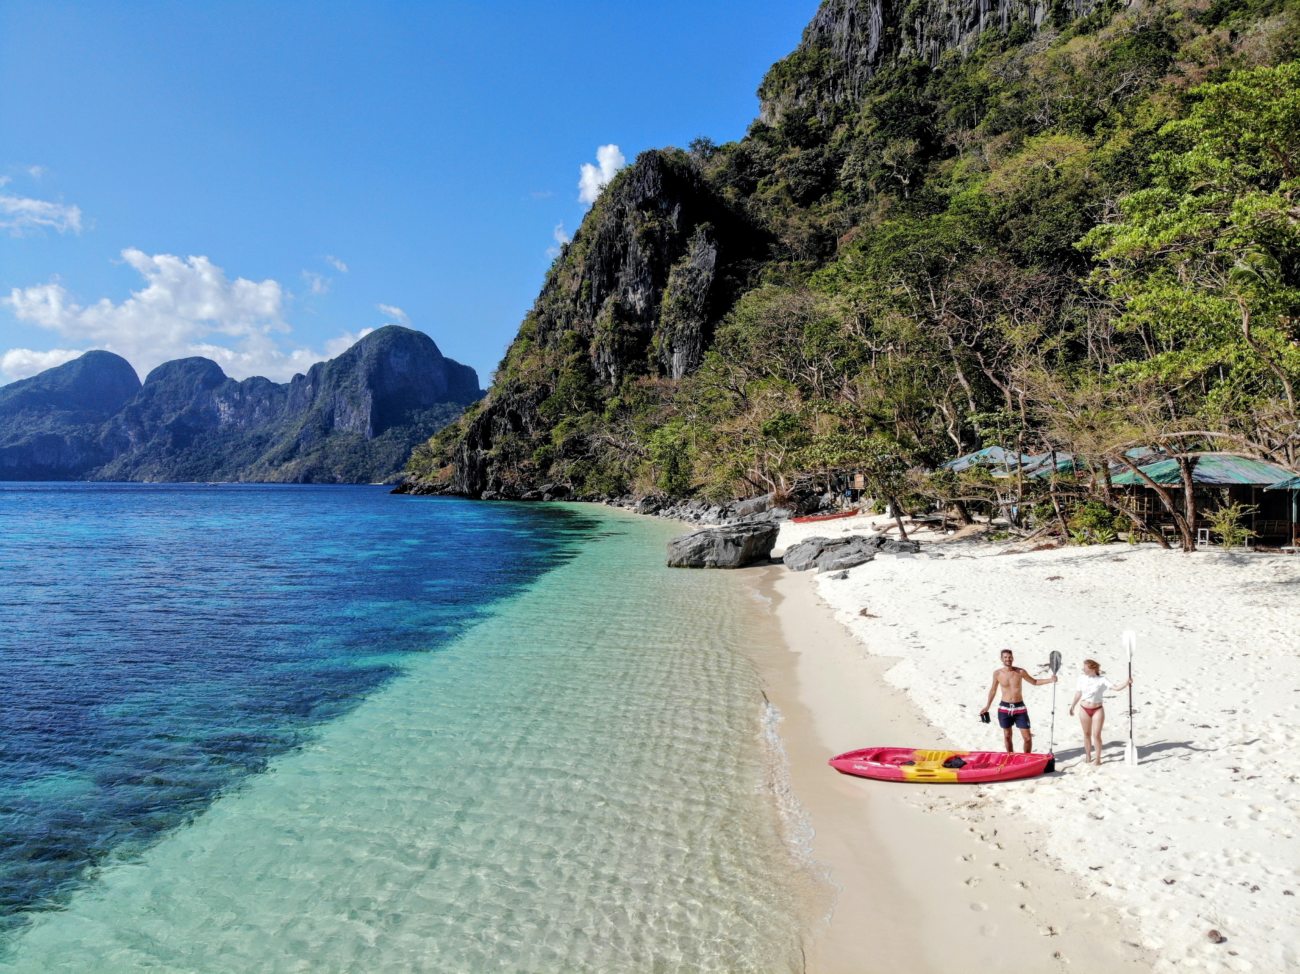
From Corong Corong Beach you can paddle to several beaches. We first paddled about 45 minutes to Ipil Beach 2. The route runs along the limestone cliffs and at one point even through a huge crack in the rock. You also pass a few other beaches along the way that you can visit on the way back.
Ipil Beach 2
Arriving at Ipil Beach 2 we were completely blown away. The scenery is simply stunning. White sand, perfectly turquoise water, and cliffs covered in green plants. But the best part… we were completely alone. So we laid out our towel under a small tree and enjoyed the wonderful time at this beautiful place.
Papaya Beach
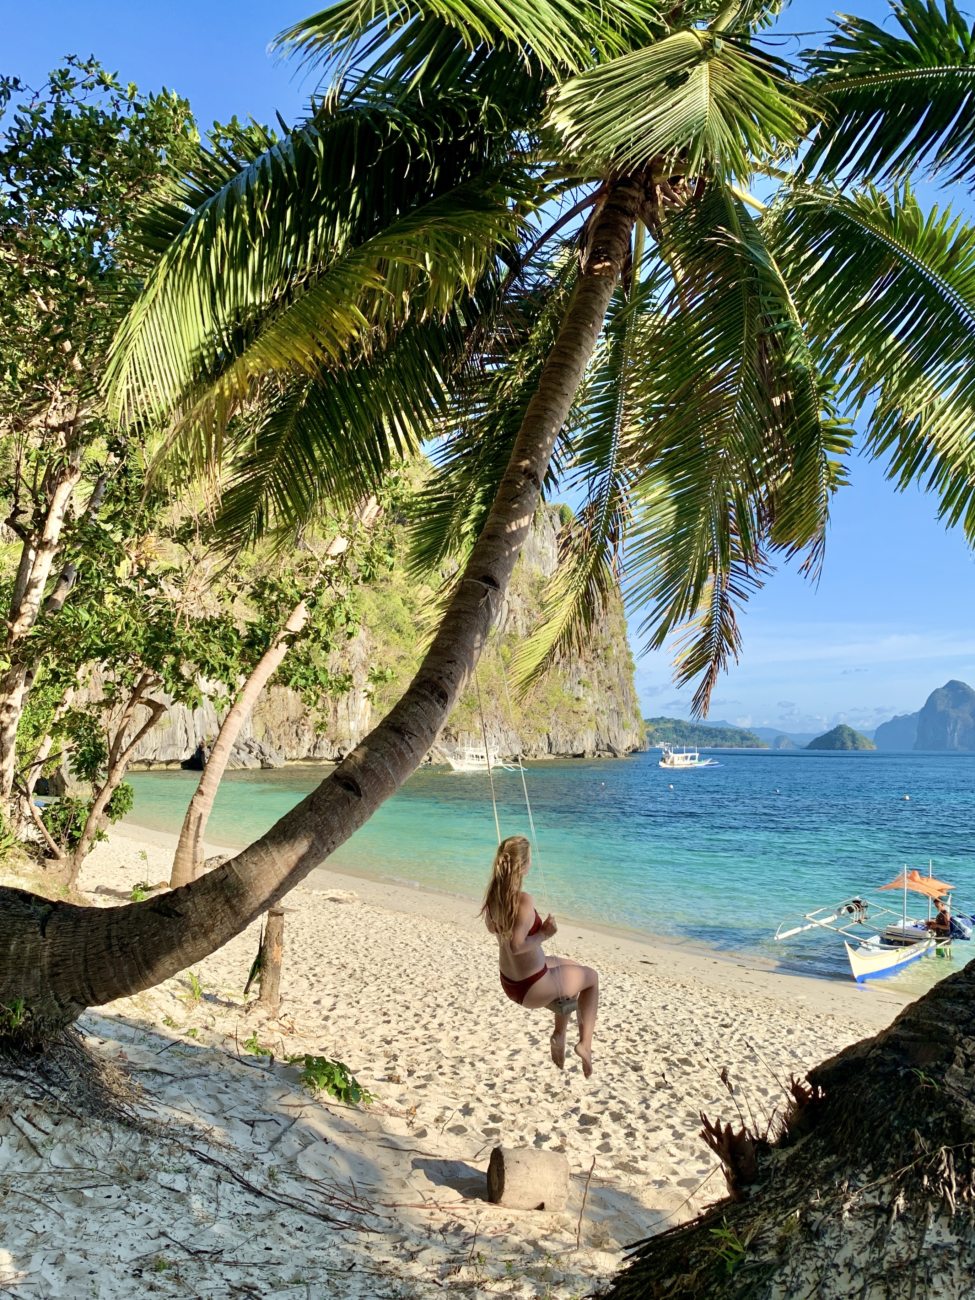
From Ipil Beach 2 we actually wanted to head to Seven Commandos first, since that’s also a beach visited on the boat tours. But that’s exactly the problem. It was swarming with boats and tourists and just too crowded for us. So we paddled on a bit further and stopped next at Papaya Beach. Besides the wonderful beach, there’s also a palm tree with a swing here that makes for a particularly great photo spot.
There were a few other tourists here too, but it was easy enough to find a quiet spot and enjoy the time at this great beach.
Since it was already late afternoon, we headed back towards Corong Corong Beach after Papaya Beach. If you have more time, you can paddle on from here to Lapus Lapus Beach. We didn’t manage that on this day.
Day 16 | Taraw Cliff + Las Cabanas Beach
Today was finally the day. Time for the real hike up Taraw Cliff. We were due back at the Canopy Walk office at 5am to meet our guide. From there we first headed towards El Nido Bakery, then continued along winding paths off the main roads to the start of the hike.
We were told to bring something to drink and sturdy shoes. Our guide then gave us gloves and headlamps, and off we went. It was still pitch dark, and you could only make out the small patch lit up by your headlamp. You had to watch every single step. In some spots you also had to climb or walk across very narrow rocks.


Our guide always told us exactly where to hold on and where to step. And so, over rocks and roots, we made it up onto the cliffs of Mount Taraw within about 45 minutes. Shortly before we reached the top it slowly started getting light, and the first birds accompanied our climb with their song. Right on time for sunrise we made it and could admire the stunning view over El Nido. Lit by the warm light with the rising sun at our backs, this was one of the best views of our Philippines backpacking trip.
We weren’t alone on the mountain, but the number of other tourists was manageable, so we could still find a spot for ourselves. There’s no viewing platform or anything like that on the mountain though. That means you have to find yourself a spot on the pointed rocks.
We spent some time here taking photos, flying the drone and simply enjoying it, before heading back down. That happens in daylight, but you still have to watch your step carefully.
By 7:30am we were back down in El Nido and had already had an amazing experience before breakfast. Breakfast at our hotel afterwards felt more than well earned.
You’ll find everything you need to know about the Taraw Cliff hike here:
Taraw Cliff Hike I El Nido Palawan
Since the start of the day had already been so exhausting, the rest of the day was all about relaxing. We chose Las Cabanas Beach for that, which borders Marimegmeg Beach but is a bit quieter and more relaxed. We spent the rest of the day here.
Day 17 | Kayak Tour and Arrival in Puerto Princesa
On our last real holiday day of our Philippines backpacking trip in El Nido we had time until the afternoon and wanted to spend it once more at a quiet beach. So after breakfast we quickly checked out of our hotel, rented a kayak, and this time paddled to Lapus Lapus Beach.


You reach the beach from Corong Corong Beach in about 10-15 minutes. Part of the beach is private property, but on our visit we could go ashore without any issues on the far right of the beach and had a small stretch of it to ourselves. We laid our towel out under a tree and spent the day swimming, snorkelling and reminiscing about our wonderful Philippines backpacking trip.
In the late afternoon we had to head back and get ready for our transfer to Puerto Princesa*. The van was supposed to pick us up at 5pm, but actually didn’t arrive until 6pm. From there it was about 5.5 hours, partly feeling like a rollercoaster ride, towards Puerto Princesa. The ride was genuinely awful, and we were so relieved when we finally arrived at our hotel.
Book a transfer to Puerto Princesa | Check prices*
Hotel Recommendation Puerto Princesa
If, like us, you have to spend a night in Puerto Princesa, we can recommend the Cleon Villas Pension*. The owner was genuinely lovely and even waited up longer for us, since we didn’t arrive until close to midnight. The rooms are simple but very clean and perfect for one night.
Cleon Villas Pension | Check prices*
Day 18 | Onward to Manila and Flight Home
On the last day of our Philippines trip, the journey home continued as we flew to Manila early in the morning. We deliberately took the morning flight to Manila, even though our flight home to Germany wasn’t until early evening. We’d heard and read again and again that domestic flights in the Philippines get delayed or even cancelled entirely. To avoid any risk, we built in enough time to catch a later flight to Manila if needed.
Everything worked out for us though, and the flight left on time. So we were in Manila by mid-morning and could still explore the city for a few hours. We left our luggage at a storage counter at the airport and set off with just a small backpack. By taxi we reached the historic district of Intramuros within about 45 minutes. You’ll find plenty of parks, museums and colonial-era buildings here.


We spent most of our time looking for air-conditioned cafés or buildings though, since it was simply incredibly hot. So we slowly wandered from one air-conditioned building to the next, taking in the sights along the way. It was quite nice to stroll around here for a few hours and pass the time before our flight. So if you also have a few hours’ layover in Manila, you should head to Intramuros.
Conclusion After Our Philippines Backpacking Trip
We’d dreamed of a backpacking trip to the Philippines for so long, and weren’t disappointed. The Philippines is simply a stunningly beautiful country, which impressed us with its underwater world, gorgeous beaches and breathtaking islands. We’re sure this won’t be our last trip to the Philippines. We’ll definitely be back!
Backpacking Philippines 2026 – FAQ
How much does backpacking the Philippines cost per day?
Expect to budget around €30-40 per day for a mid-range backpacking trip, covering accommodation, food, local transport and a few tours. Guesthouses and simple hotels typically cost €15-30 a night for a double room, meals range from a couple of euros for local eateries to €10-15 for restaurants aimed at tourists, and inter-island flights usually cost €20-60 depending on the route and how far in advance you book.
Is 2 weeks enough for the Philippines, or do I need 3?
Two weeks is enough to comfortably cover Cebu, Coron and El Nido if you shorten your stay in each place slightly, while three weeks lets you experience all three islands without feeling rushed. With 3 weeks you get 5 days around Moalboal/Cebu, a full 3-day boat trip between Coron and El Nido, and a relaxed week in El Nido itself – with 2 weeks we’d trim Cebu to 3 days and El Nido to 4, without cutting the boat trip, which is the trip’s highlight.
Do I need a visa to backpack the Philippines?
Travellers from Germany, Austria, Switzerland and most EU countries don’t need a visa for stays of up to 30 days – you get a visa-free entry stamp on arrival. Your passport needs to be valid for at least 6 months beyond your entry date, and immigration may ask to see proof of onward travel (a return or connecting flight ticket).
Is backpacking the Philippines safe?
Yes, the main backpacker route through Cebu, Coron and El Nido is generally safe, with the usual common-sense precautions for solo and female travellers. Take care with scooter traffic, watch your belongings on boats and in busy areas, and check the German Federal Foreign Office’s travel advisory before your trip, particularly for regions outside the main tourist route such as parts of Mindanao.
What’s the best time of year to visit the Philippines?
The dry season from December to May is the best time to visit, with January to April offering the most reliable weather for island hopping and waterfall visits. We travelled in March and had mostly sunny days, though some sites were still recovering from typhoon damage from the previous rainy season – it’s worth checking the current status of specific attractions like Kawasan Falls before you go.
Thanks for sharing your itinerary!
You mentioned you rented scooters, can you share where you rented from/what that process was like?
Hi Clev,
we rented ours directly in our hotels. Price was around 5-8$ per day. renting was really easy. sometimes they demand signing a form, but mostly it’s very easy and fast.
best wishes,
Andreas
Can you tell me what month you did this trip
Hi Robyn,
we did travel in March.
Andreas